| |
|
|
| |
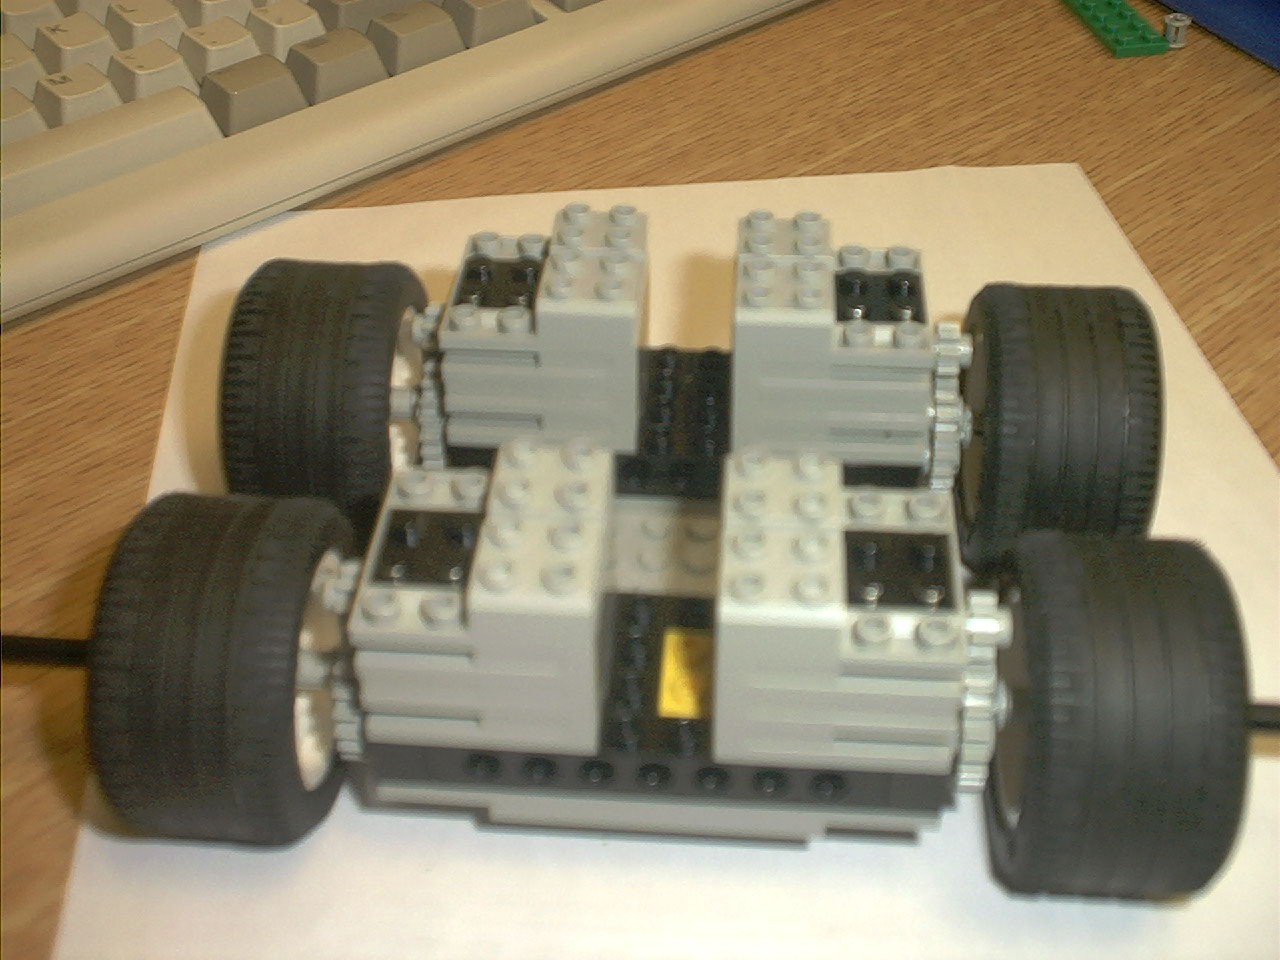
Center
of Robot
| Install the four motors
|
 |
|
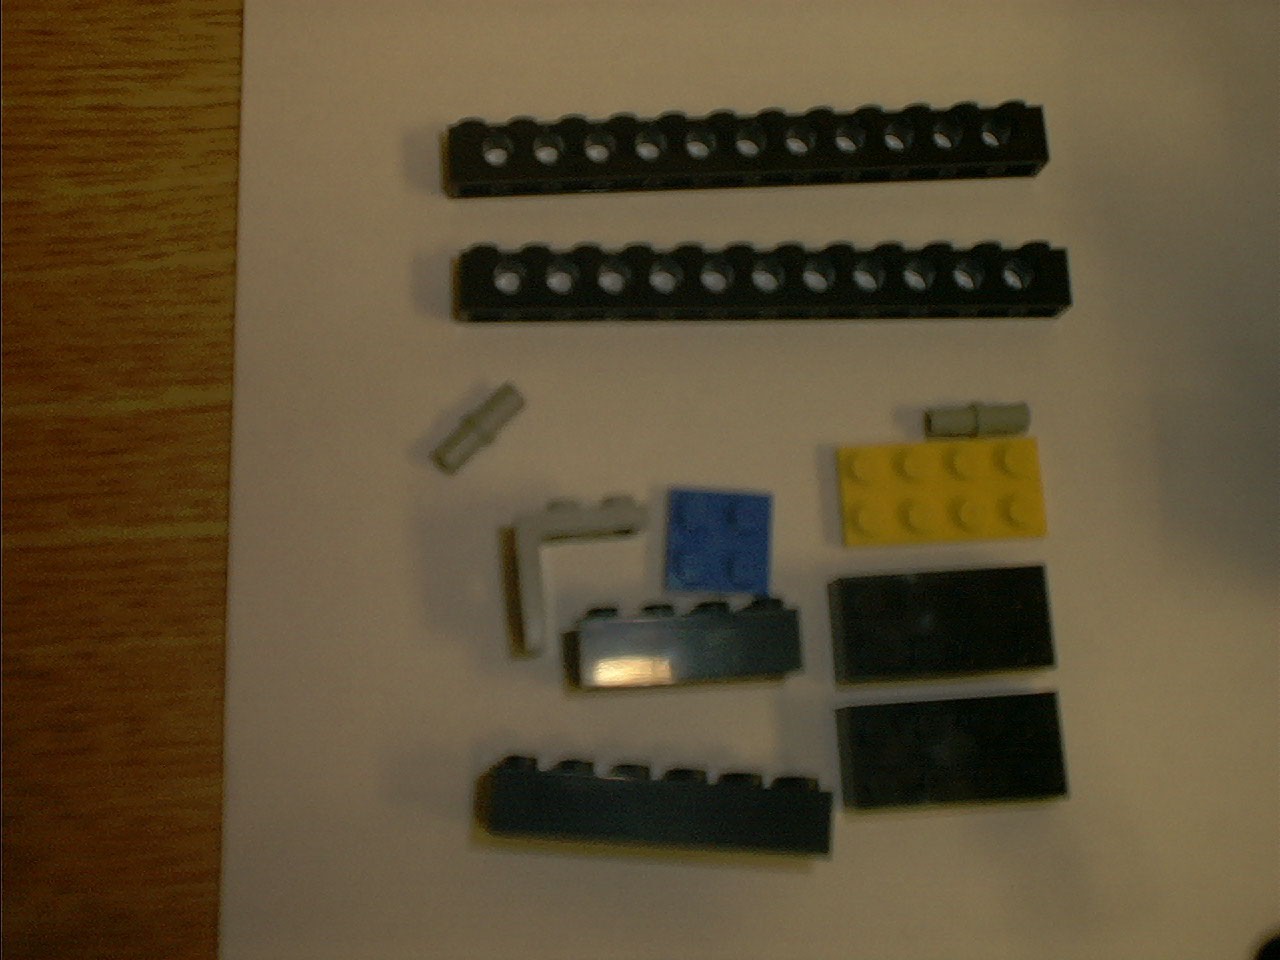
Pieces need to be placed between motors:
(2)connectors, (2) 11 hole pieces, flat 8 peg piece,
(3) 8 peg rectangles, 12 peg rectangle, flat square,
change direction piece
|
 |
|
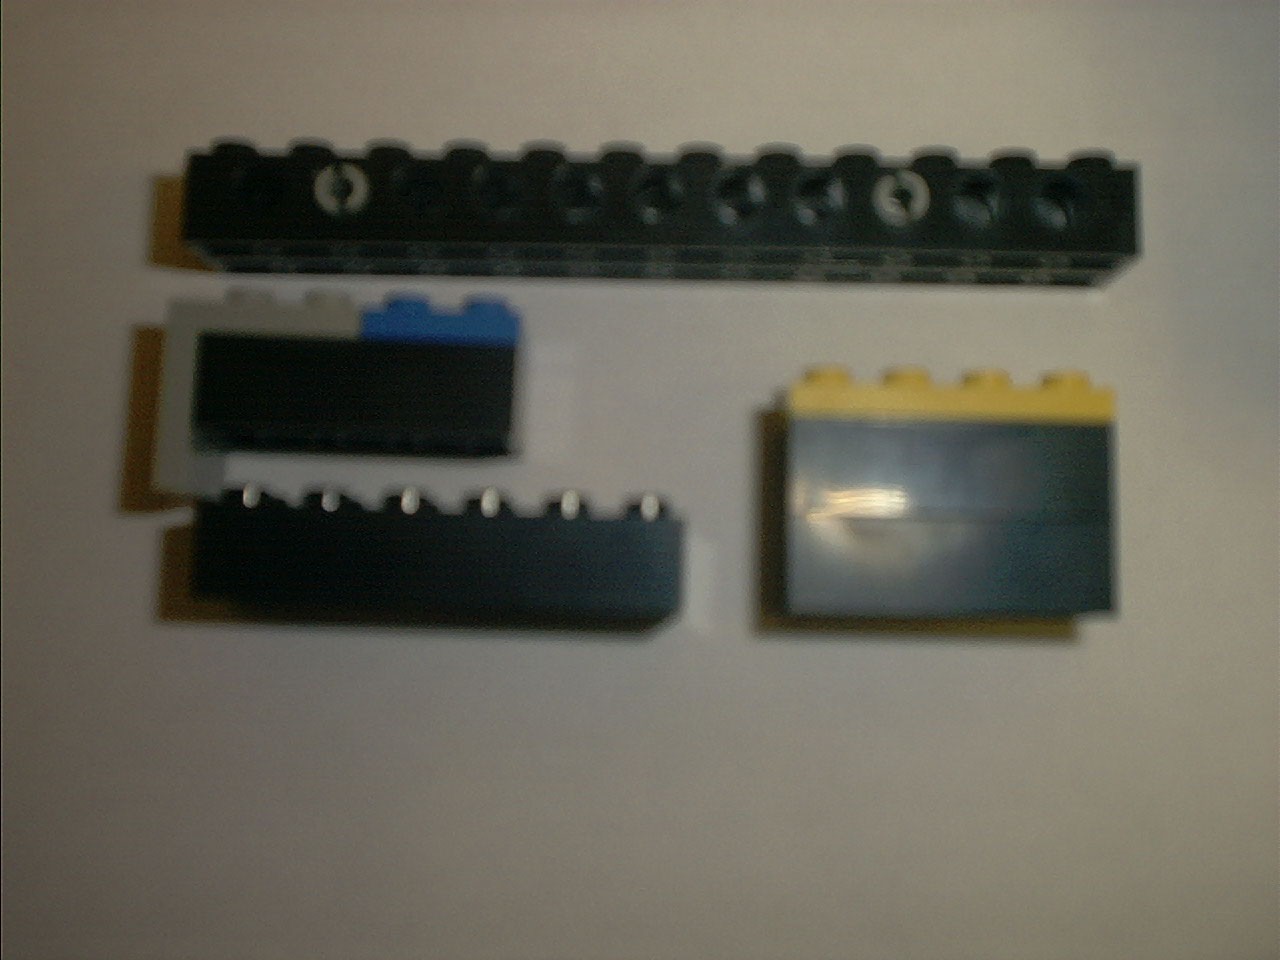
How these pieces fit together. Fit in exactly like
this, left part of the picture is the front of the robot.
|
 |
|
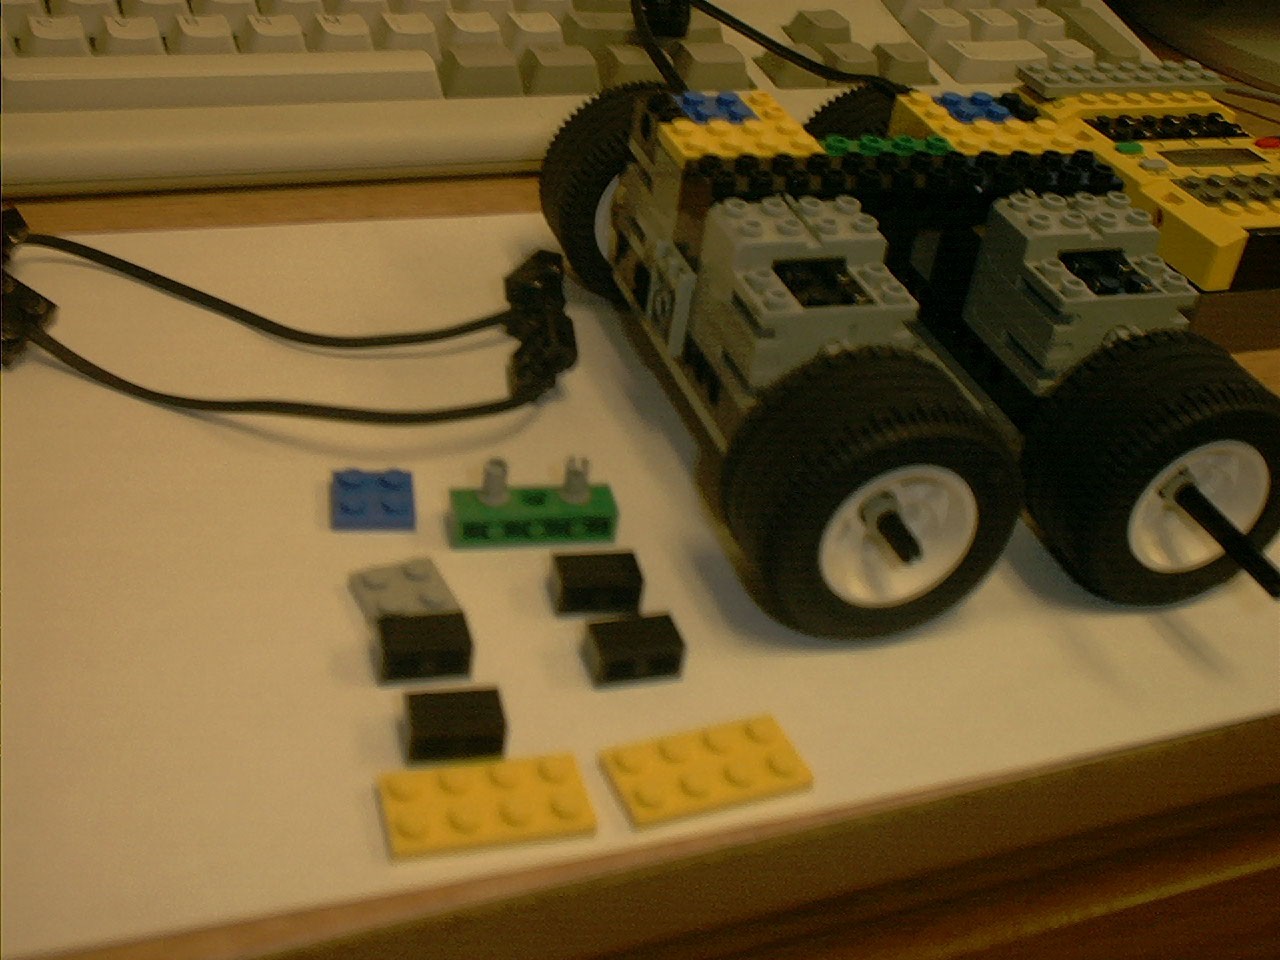
Picture shows previous parts installed and the parts
of the next step. Note: parts of only one side shown,
as it is the same on both sides.
(2) flat squares, (2) flat 8 peg rectangles, (4) skinny
½ squares, 3 holes piece, 2 connectors, 2 wire
connectors
|
 |
|
Wire connectors connected to motor(wires facing out),
flat squares placed on top of these wire connectors,
flat rectangels placed between center and the flat squares,
1/2 squares placed on either side of the flat squares,
and finally the 3 hole pieces are snapped to the center
frame
You may now install the brick, the top of the brick
should be on the side of the body with the change direction
piece
|
 |
|
| |
|
